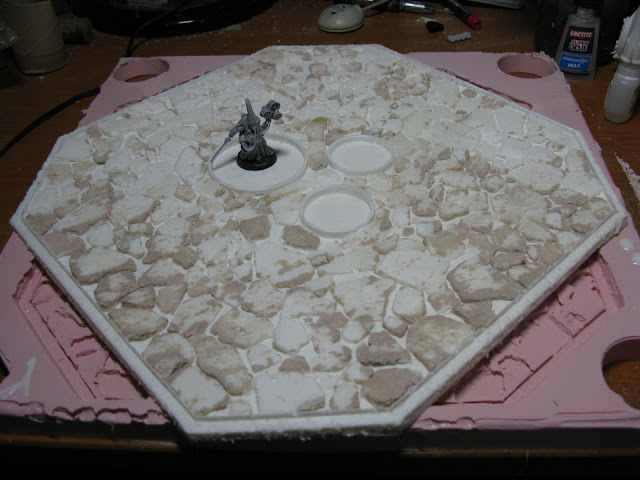
I got some hobby on during the holidays and I decided to make a nurgle theme vertion of the games workshop landing pad.
I wanted it to look like a temple then a hi tech piece of scenery, below is a scetch I made
To make the floor I will use plaster, its cheap breaks up easy and gives a lovely random texture.
so I mix water and plaster and let it dry for a day
Next I am going to start the armarture for the supporting column, its going to be 4 giant nurgle hands holding the pad up.
I cut a long piece of wire, bend in half, hold the edges with some twisers and trist the other side with a paint brush.
I pinned the wire on a piece of resin sprue and shaped it to look like a hand, it will only have 4 fingers (nurgle style)
Next I use some tinfoil to bulk up the armature, its a cheap way of building mass instead of using clay or putty.
I cover it with super sculptey, I just want a base to work with details will come later.
I stick it in the oven for 15 minutes to harden.
Next I am going to cut out the pads shape, about 11,5" square.
I cut the edges of too
and then glue this 2 step shaped plasticard on the edges.
By then the hand is cooked.
I cut with my dremmel some plastic pipes, to shape the nurgle circles
Toss the dry plaster in a box
and very patiently cut and glue (pva) each tile in.
this took alot of hours... so to not go crazy I work on the hand again
pinned some wire for the upper piece of the fingers and thumb.
Back to the pad, I tried to cut out 3 pointers but the plaster broke, so I added some milliput and shaped the pointers.
many many many hours later...
left over...
I fill in the gaps with milliput.
Cause the metal rim (plasticard) is too smoth I attack it with my dremel
the result
That completes the pad, now I am going to cast it. I make a box for it. Usualy I use lego but for this size project I used wood. The cylinders in the corners are there to reduse the use of silicon rubber.
once I get the shape right I glue the pad in.
 Silicone rubber is poured and in
 I knew before hand the plaster will stick to the rubber and thats ok.
I clean up the mold as much as I can after a few casts the plaster will be removed.
First cast you can see the plaster joining the resin.
I continue with the hand, mote tinfoil
and more super sculptey, some people freaked out when I showed this to them, said it looks like a baby hand. tinfoil the wrist. Also you can see at the back the second cast has almost no plaster in it.
More super sculptey.
This is the end of part 1.Part 2 will inclued some pictures of scuplting the hand and hopefuly casting it.
Hope you liked it. Please feel free to plug in your blogs.


Hey :D
ReplyDeleteDid you ever do a part 2? This looks like it is going to be great and I really enjoyed following your progress through the pictures. Thank you.